Help Center
Here you will get access to the entire process of how to use the eComGlobus App and how it will help you manage your entire eCommerce logistics process very easily in a single platform
Registration with ecomglobus
-
Go to www.ecomglobus.com in your web browser.
-
Click on Click on the “START FREE TRIAL” or “GET STARTED” button.
-
You should be directed to the signup screen where you can create your account.
-
Fill in your information such as your name, business name, email address, and other required details.
-
Once all details are filled, click on the “CREATE YOUR 7-DAYS FREE TRIAL ACCOUNT” button.

-
You need to verify your email address to complete the signup process. Check your email inbox for a verification message and follow the instructions provided.
-

-
Once your email is verified, you should be directed to the LOGIN screen of ecomglobus.
-
Fill your email address and password to LOGIN and start exploring its features.
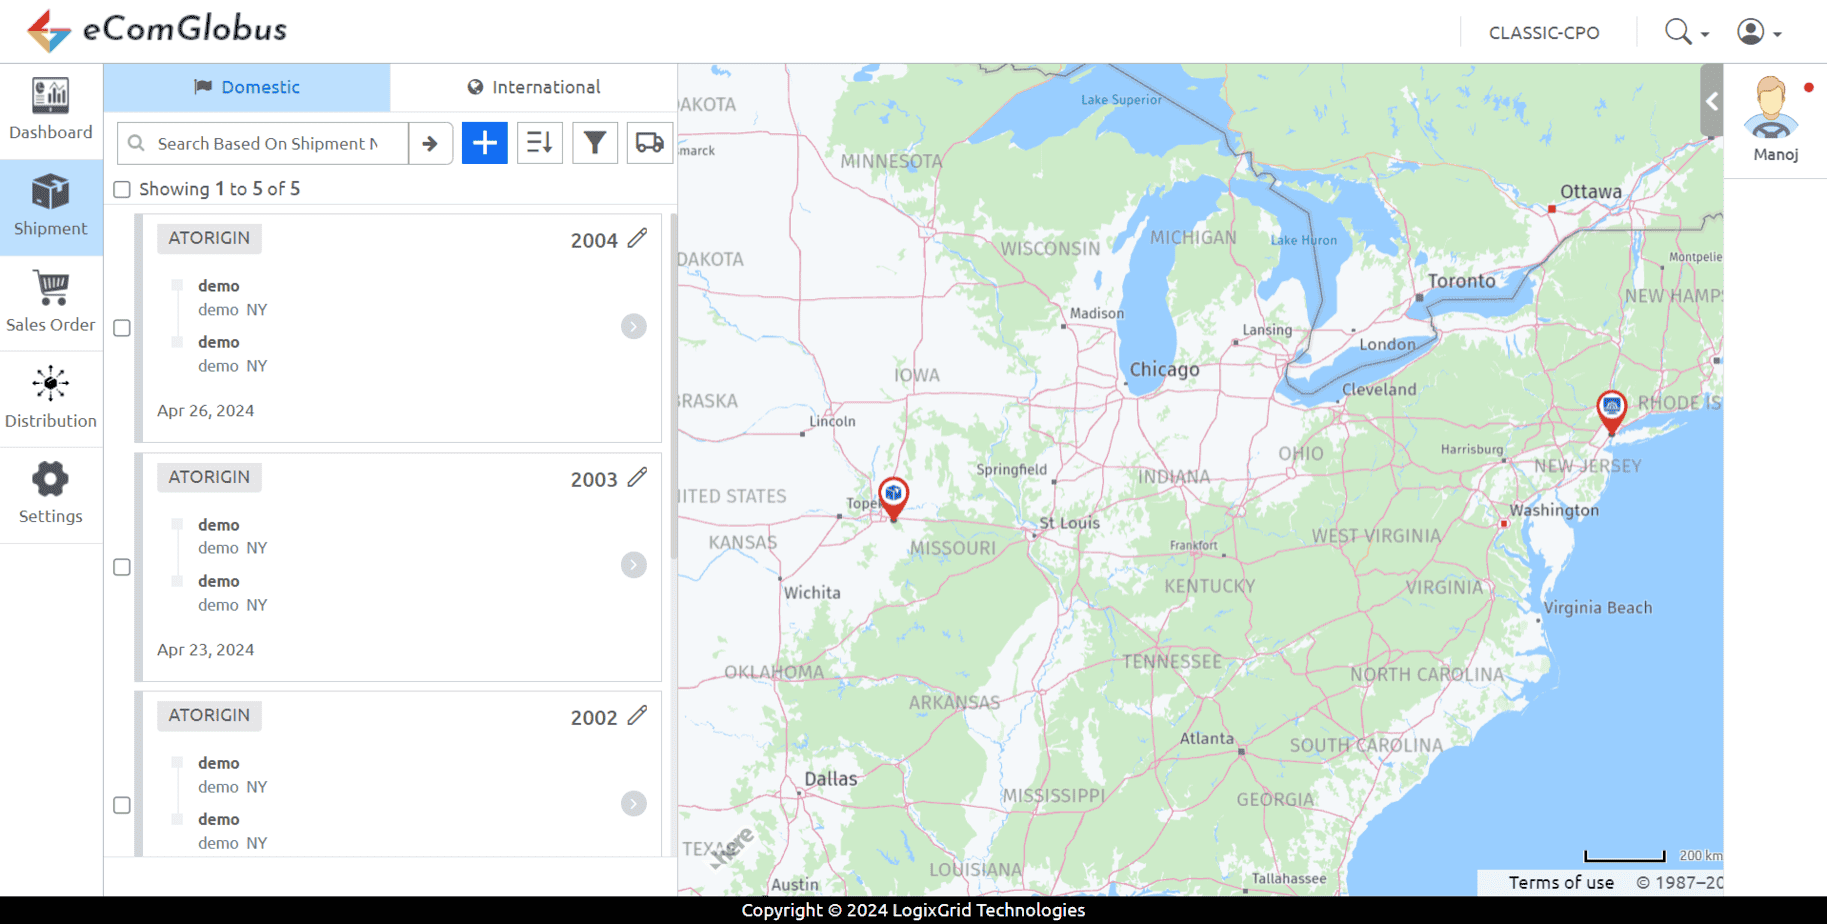
How to create a shipment
-
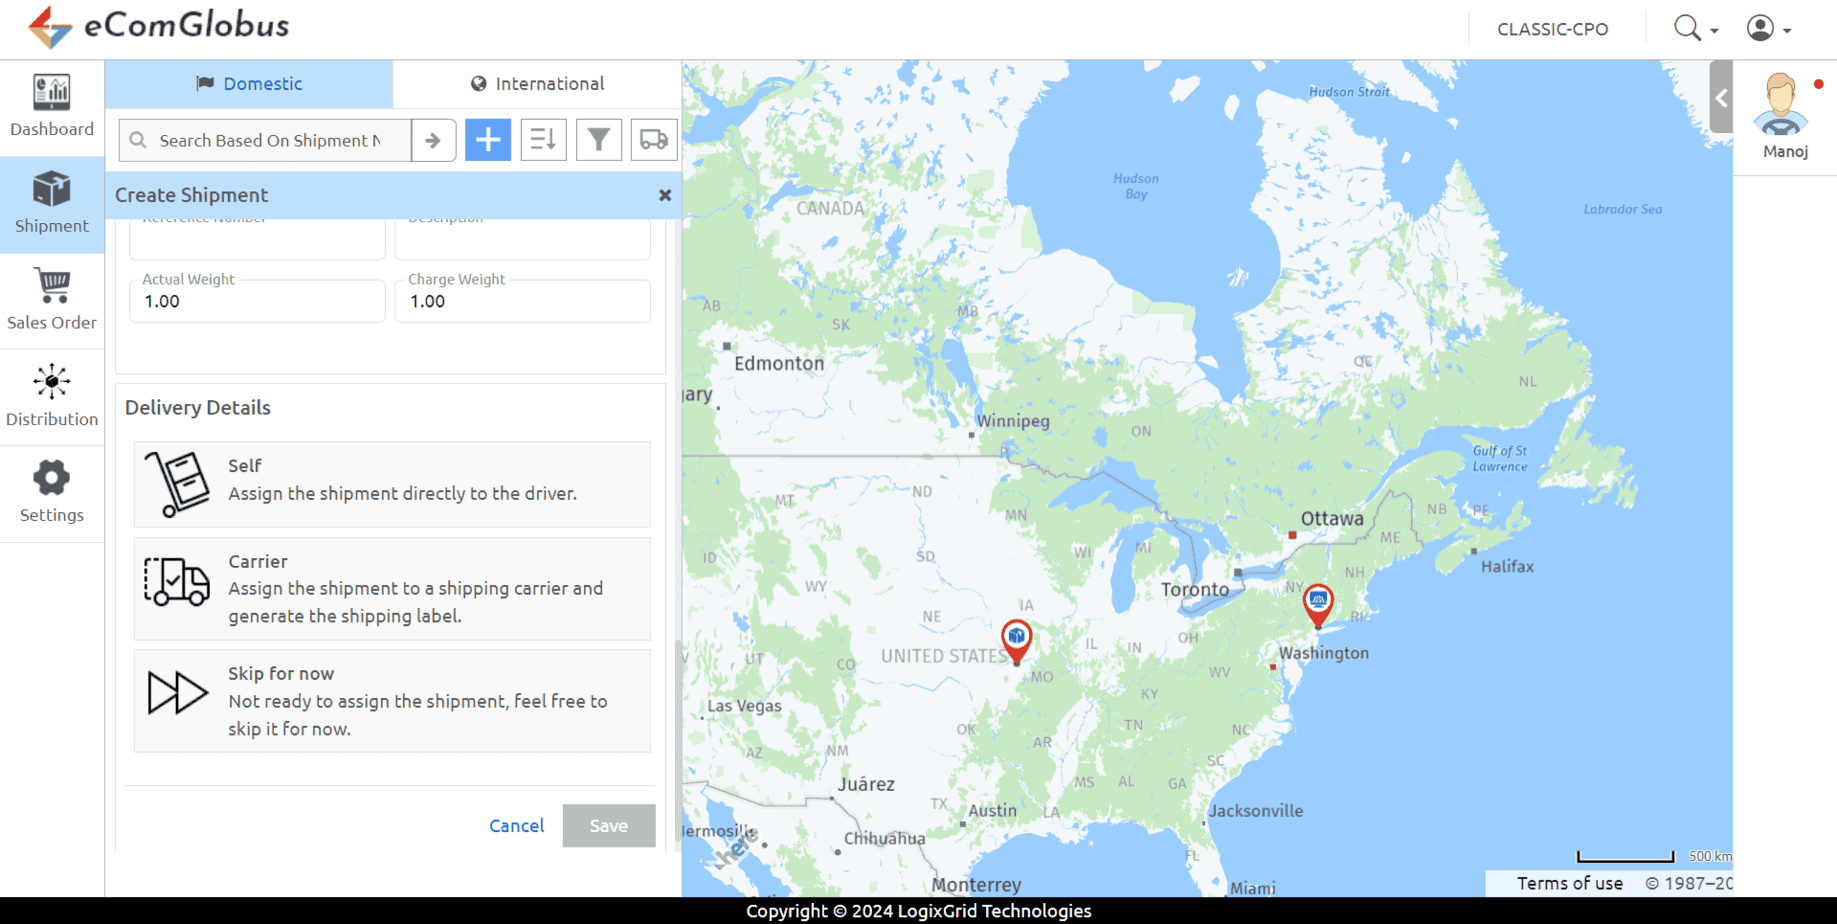
Click on shipment to create a domestic and international shipment.
-
To create a new shipment click on + icon and enter all the required information like consignor and consignee’s name, mobile number, address, package details, and additional details like invoice number and invoice amount.

-
For the delivery of the shipment, Choose the carrier that will deliver the shipment. Select from the list of available carriers or assign the shipment directly to the driver. If you are not ready to assign the shipment you can skip it for now.
-
To allocate the shipment to the driver, you need to create shipments first, now that we have already created the shipment, let’s allocate it to the driver.
-
To allocate the shipment to the driver, you need to select the shipment which you want to allocate to the driver.
-
After selecting the shipment, click on the allocate delivery icon and select the available driver to allocate the shipment.
-
If you have selected the “Skip for now” delivery option while creating the shipment you can allocate the shipment to the driver from setting’s screen – driver section.

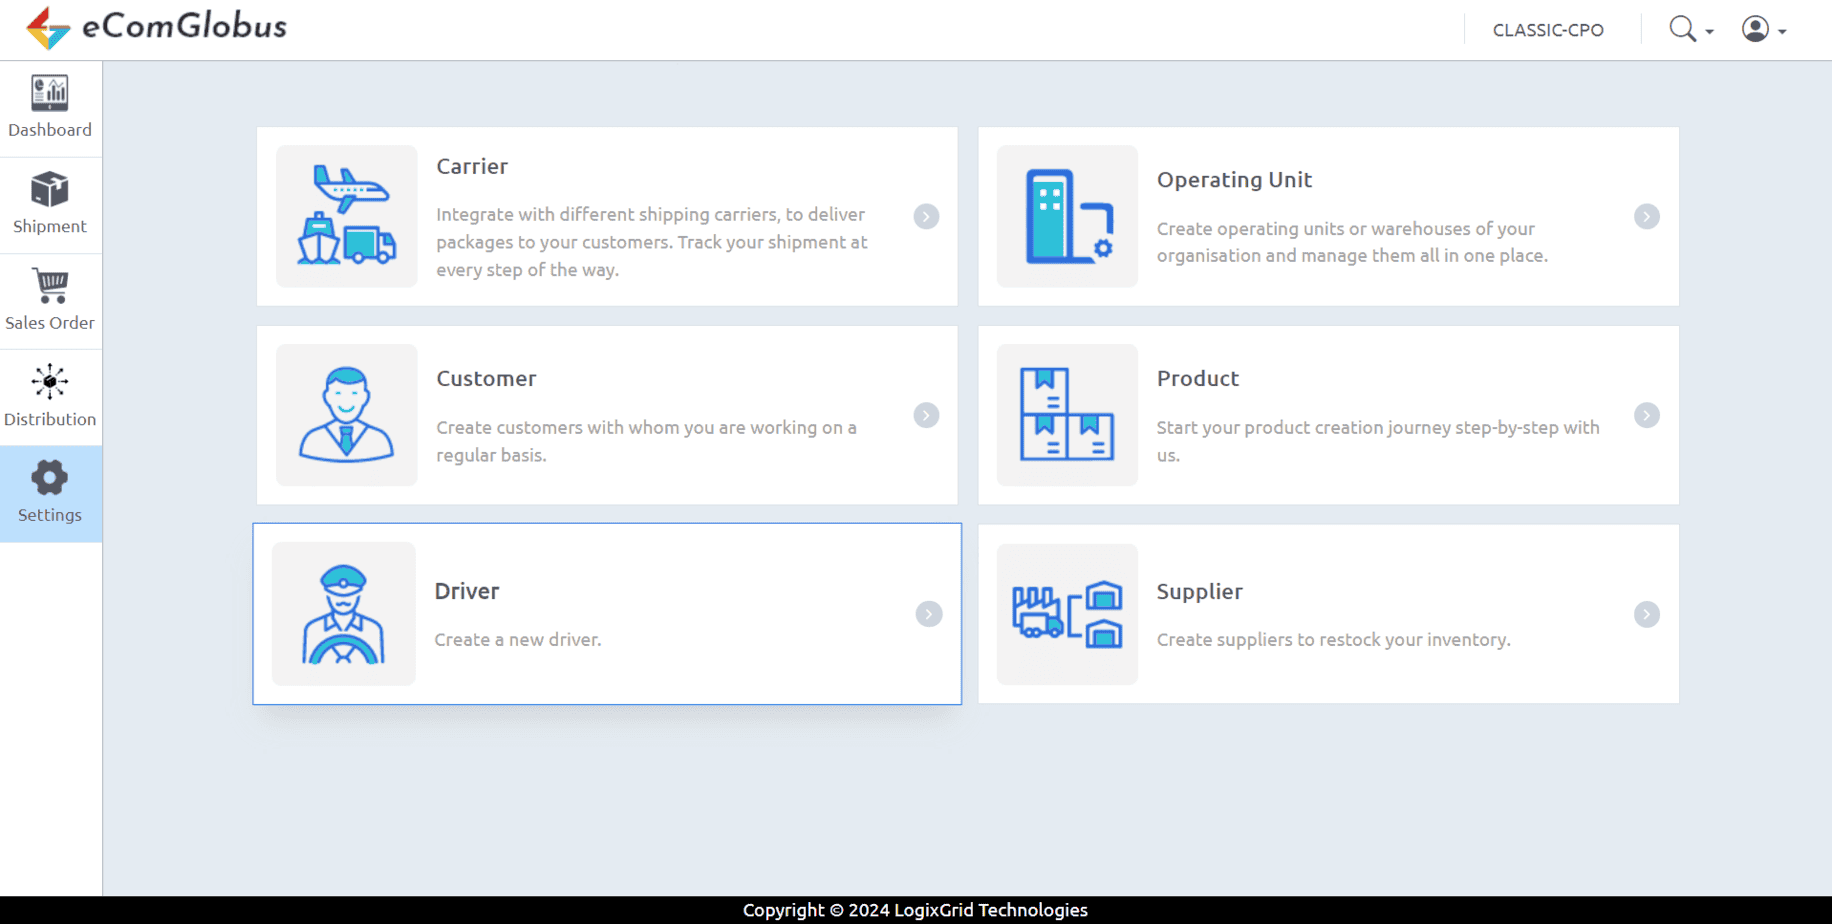
How to create a driver?
-
To create the driver, go to settings – driver’s section.
-
Click on the “+Driver” button and fill in all the details like name, email.
-
Click on the “Create” button to create the driver successfully.

-
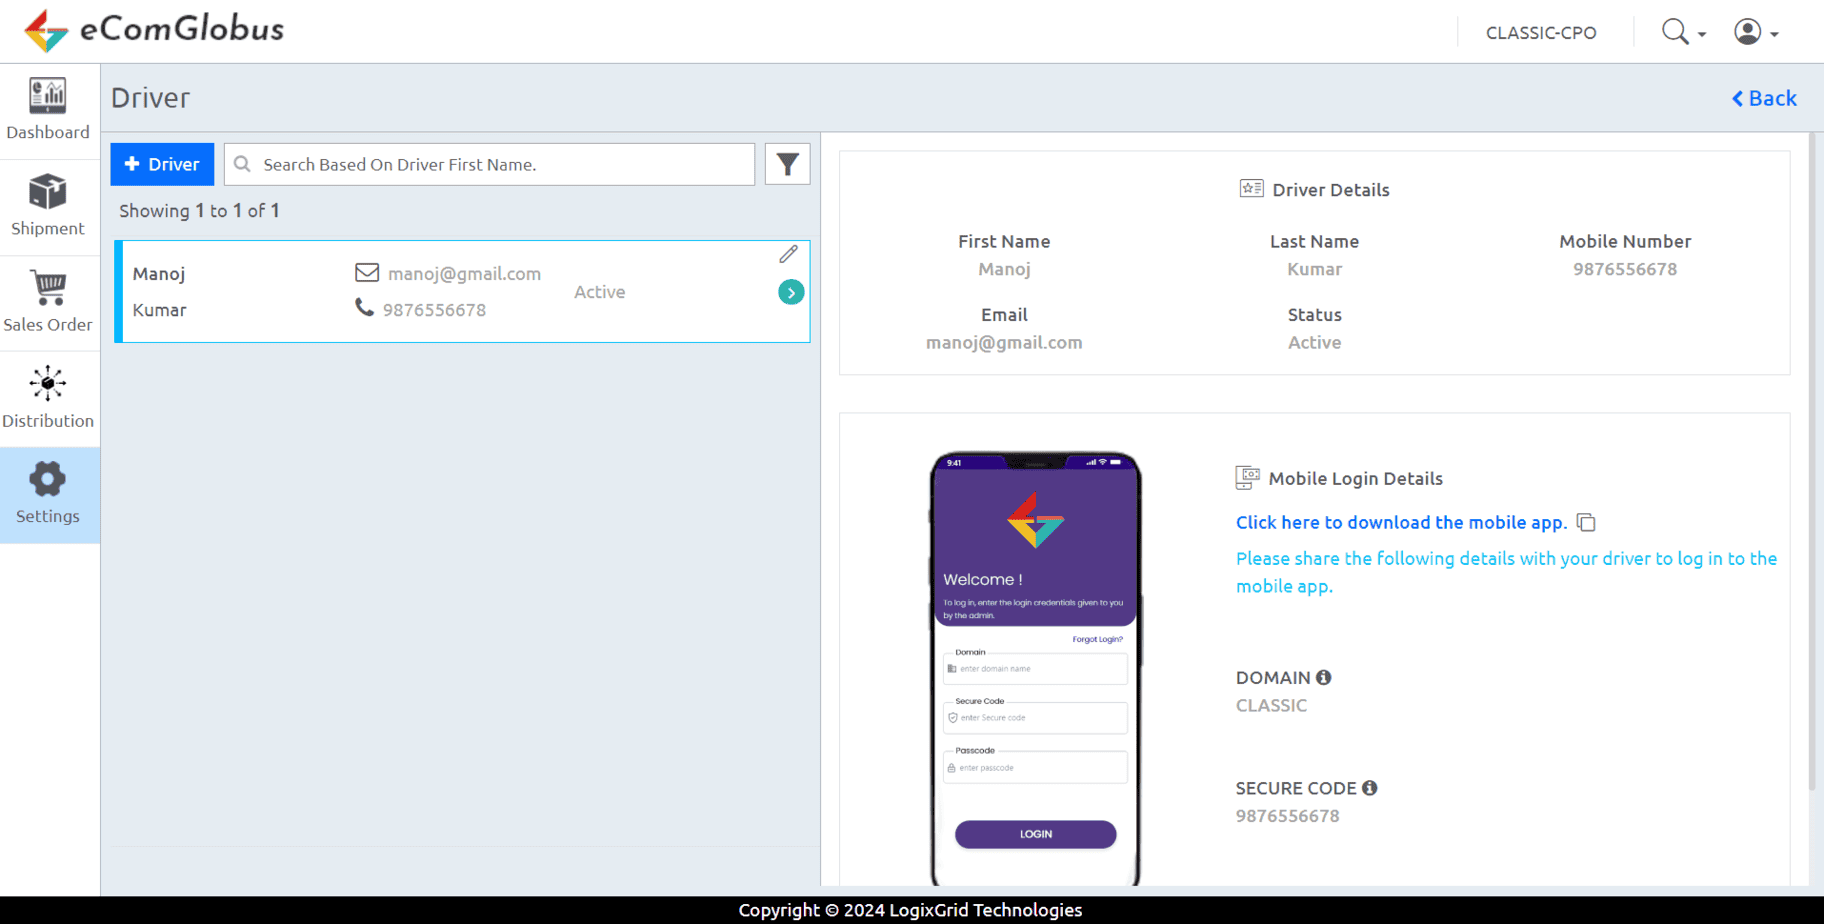
Once your driver is successfully created you will be able to see the driver details on the new screen.
-
On the right hand side of the screen, you will see the login credentials of the driver which will be used to login the driver in the mobile app.
-
You can download the mobile app by clicking on “Click here to download the mobile app”
How to assign shipments to the driver?
-
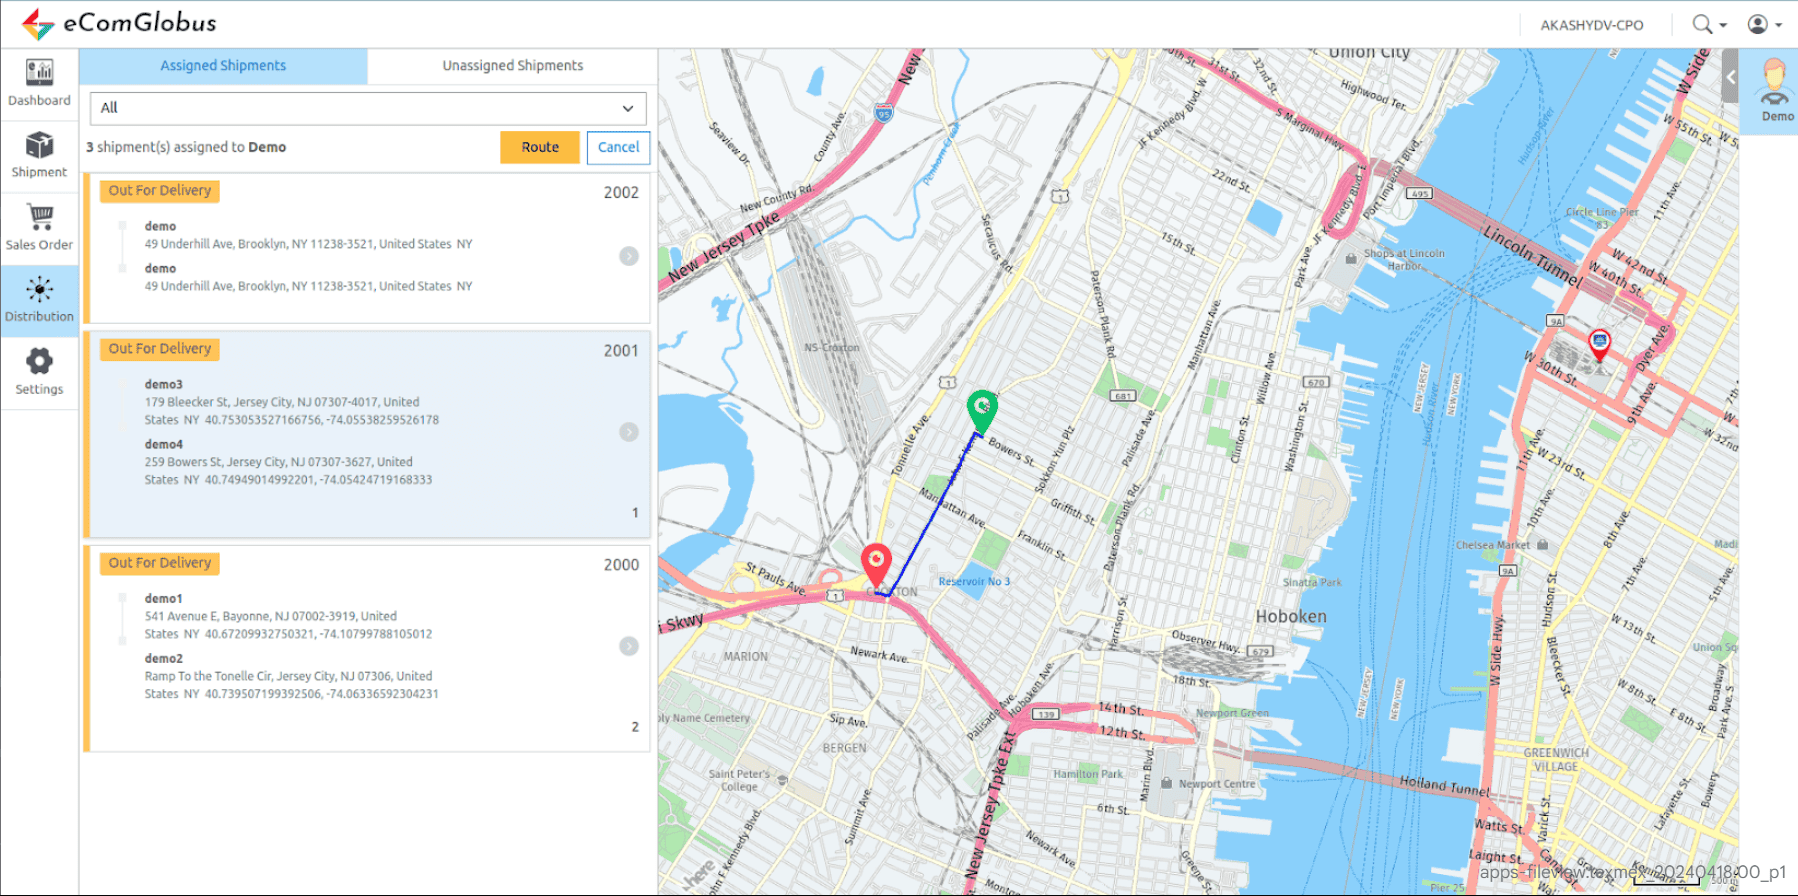
Click on the distribution icon, you can see both assigned and unassigned shipments here.
-
You can access the driver list by clicking on the right-hand side of the screen. By clicking on the driver you can see all the shipments assigned to that driver.

-
You can do the routing by clicking on the “Route” button. Now you can get the shortest route for the driver to deliver the assigned shipment.
-
Click on the “Dispatch Dashboard” button to see how many dispatches are scheduled for today or tomorrow.
-
You can also check Total COD collected and how many shipments are delivered and yet to deliver.

How to create a product?
-
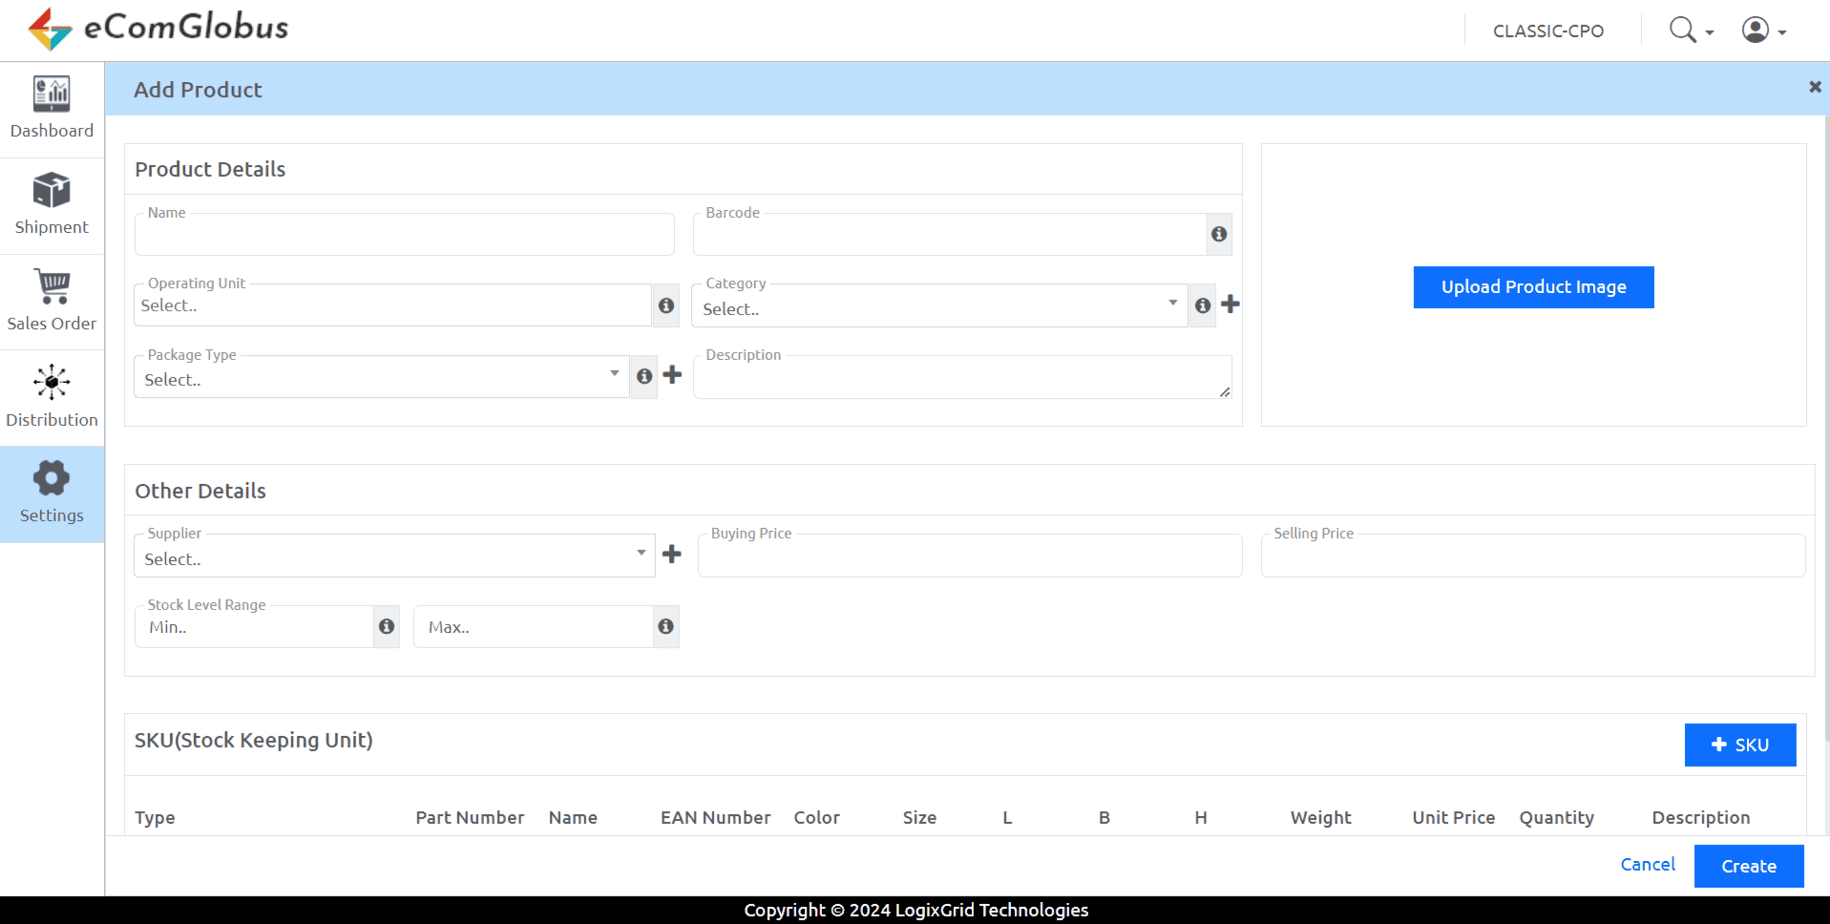
To create a new product, go to settings and click the “Product” section.

-
Fill all the details like name, category, weight, selling price, upload image of the product for visual reference. Once all required information is entered, click on the “Create” button to create the product in the system.
-
Your product is now successfully created.

How to create a sales order?
-
-
Click on the sales order icon to create an order and start filling customer information like reference number, date and supplier.
-
Add all the product details like part number, quantity, selling price.
-
By clicking on “Add Row” you can add more products.
-
By following these steps, you can create a sales order.

-
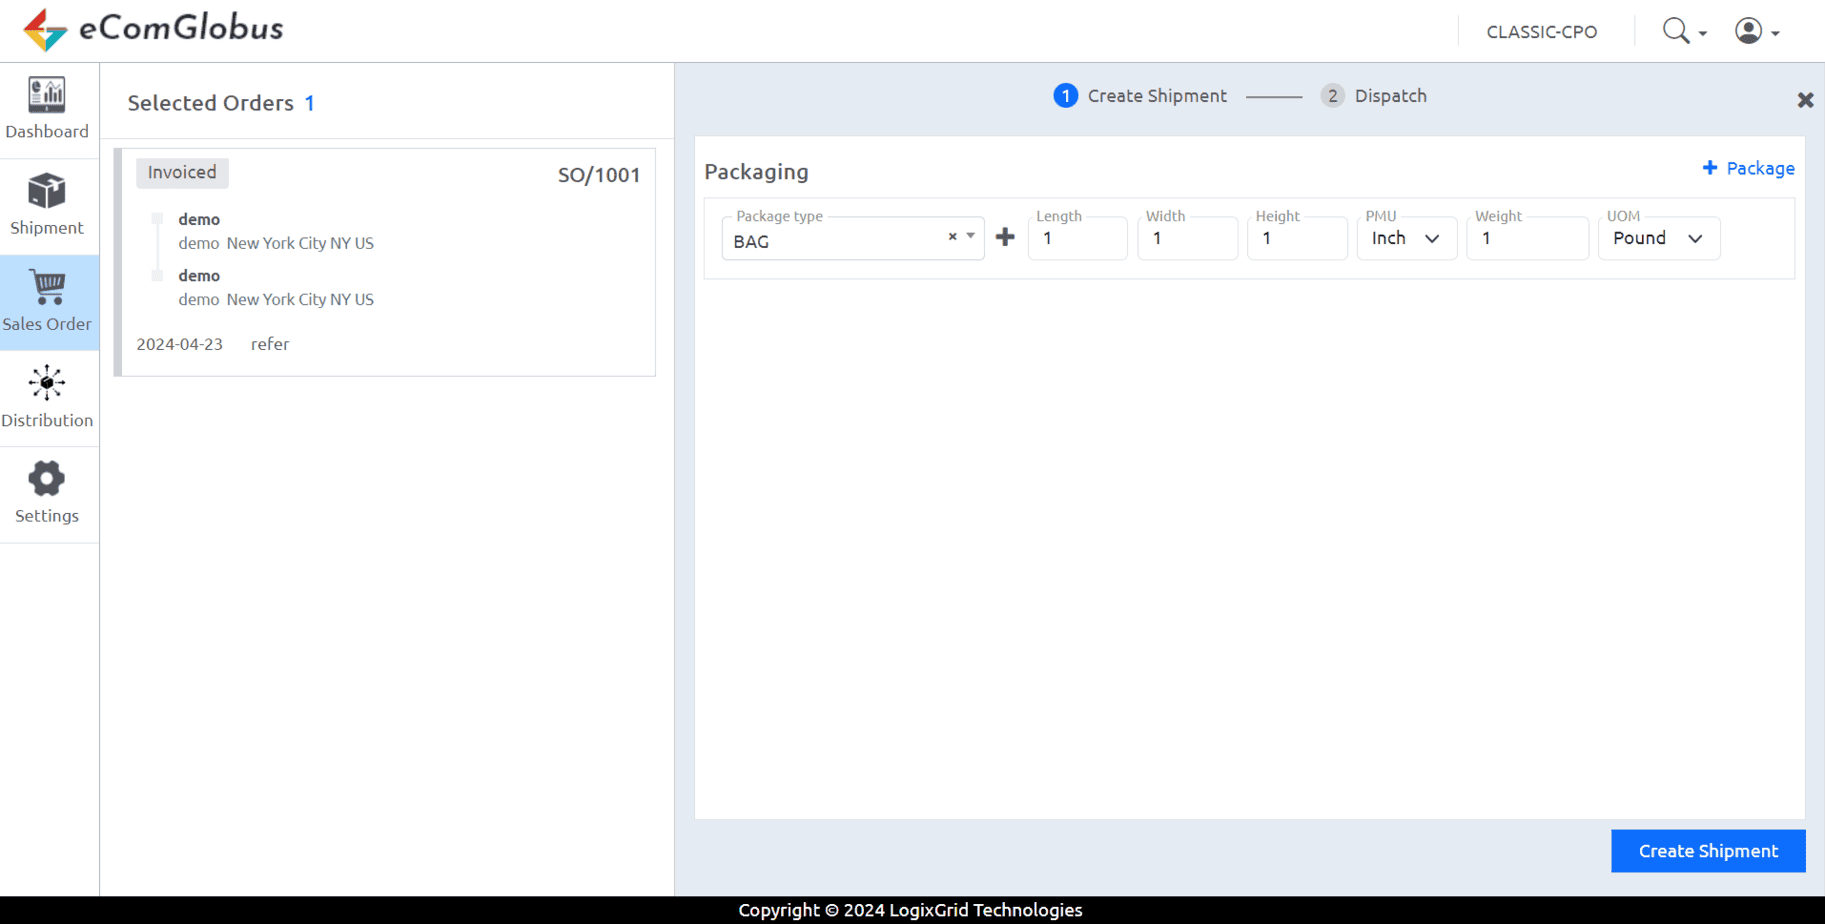
Once your sales order is created successfully, click on the dispatch button.

-
Click on “create shipment button” to proceed further.
-
-
After creating the shipment you have the option to dispatch the shipment by yourself or through a carrier.

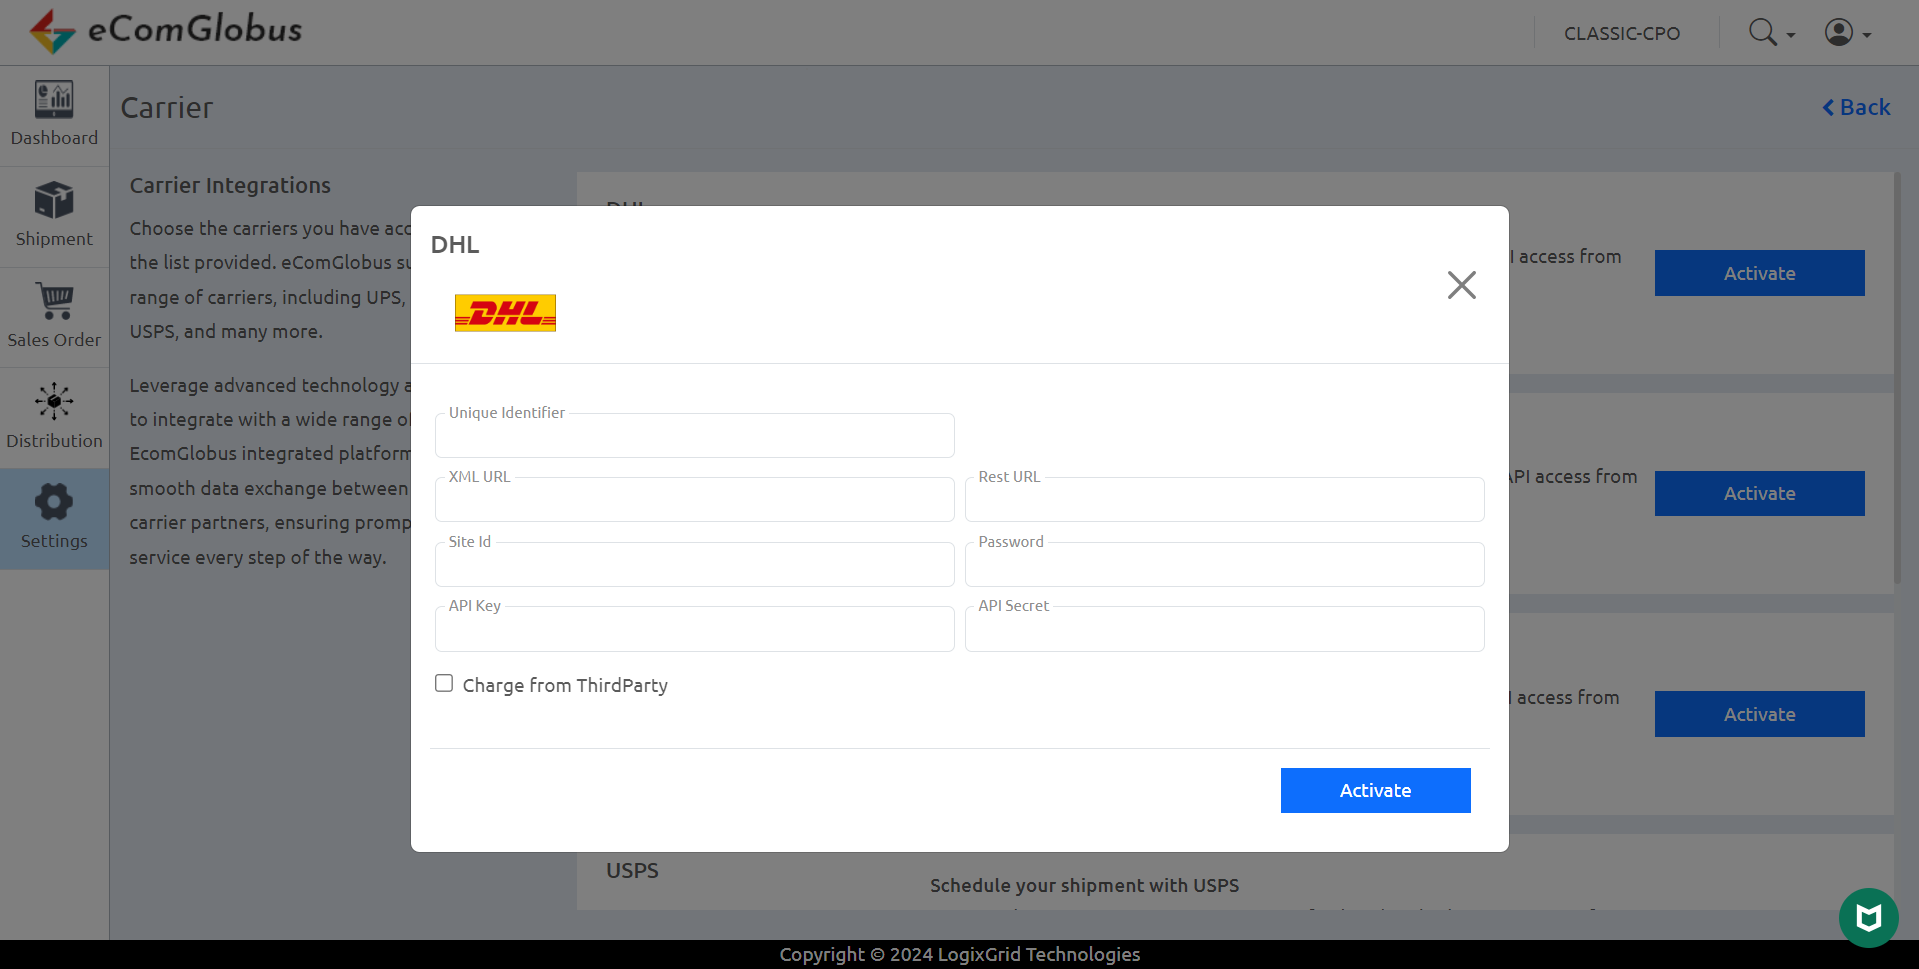
How to set up a Carrier Account ?
-
Go to the “Settings” section and select the “Carrier” option.
-
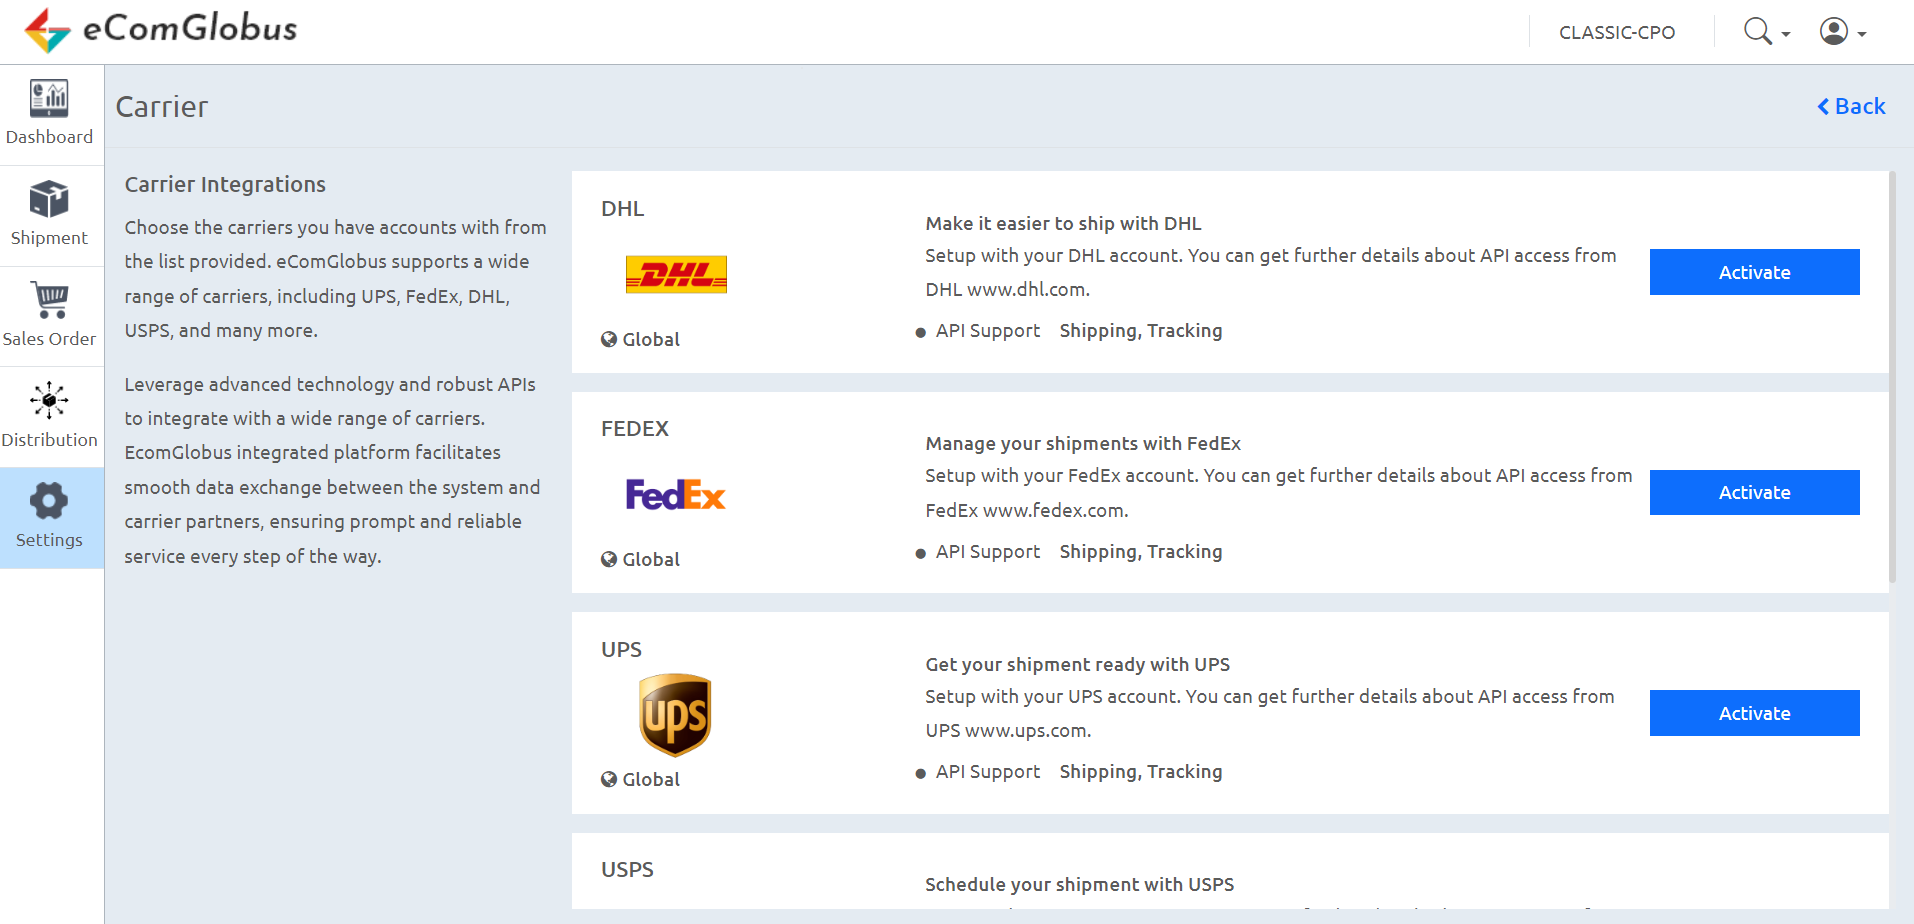
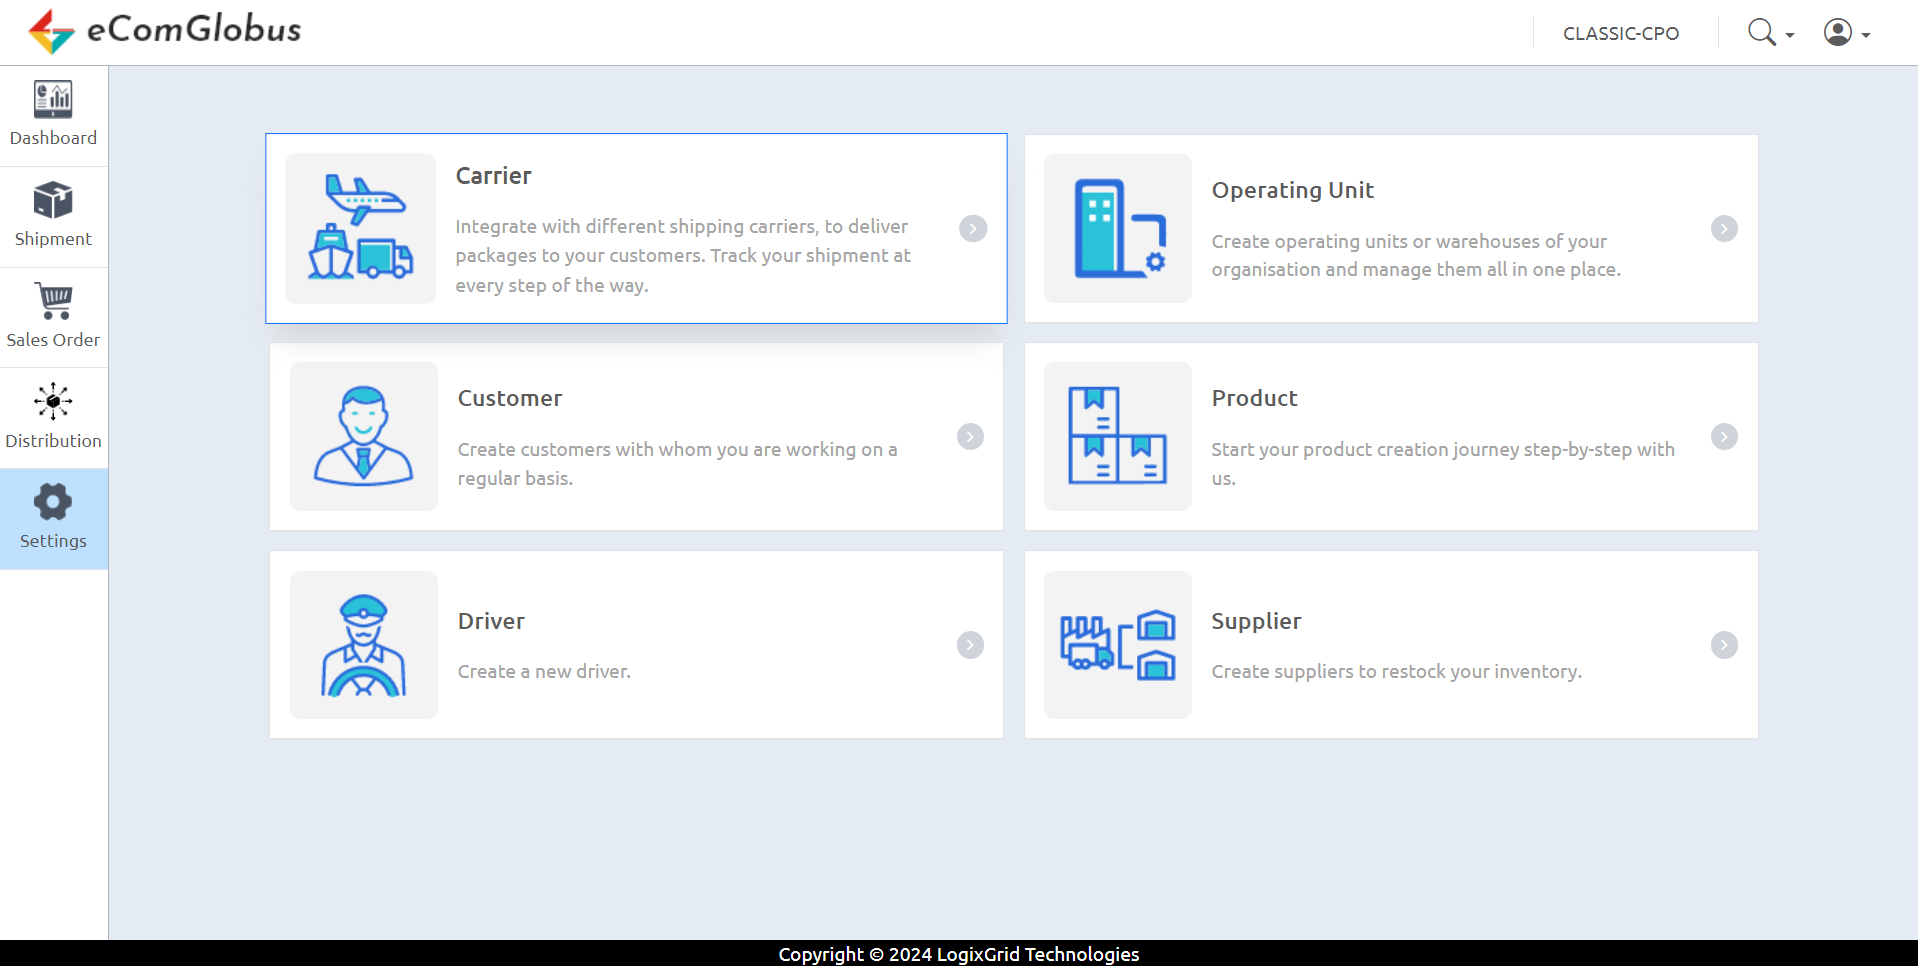 Upon selecting “Carrier,” you’ll see a Carrier list.
 -
From the list provided, activate the carriers you have existing accounts with. Click on each carrier to activate your account.
-
-
By completing these steps, you’ll successfully activate your carrier accounts.
Once you’ve selected your carriers, you need to fill in all the required information to activate your carrier accounts. Ensure that you provide accurate and complete details as requested.